找到
5
篇与
代码
相关的结果
-
 404表情脸(可复制源代码) 效果演示 640.gif图片 源代码 <!DOCTYPE html> <html lang="zh-CN"> <head> <meta charset="UTF-8"> <meta name="viewport" content="width=device-width, initial-scale=1.0"> <title>404表情脸</title> <style> * { border: 0; box-sizing: border-box; margin: 0; padding: 0; } :root { --hue: 223; --sat: 10%; --light: hsl(var(--hue), var(--sat), 95%); --dark: hsl(var(--hue), var(--sat), 5%); --trans-dur: 0.3s; color-scheme: light dark; font-size: clamp(1rem, 0.95rem + 0.25vw, 1.25rem); } body { background-color: light-dark(var(--light), var(--dark)); color: light-dark(var(--dark), var(--light)); font: 1em / 1.5 sans-serif; display: grid; place-items: center; height: 100vh; transition: background-color var(--trans-dur), color var(--trans-dur); } main { padding: 1.5em 0; } .face { display: block; width: 12em; height: auto; } .face__eyes, .face__eye-lid, .face__mouth-left, .face__mouth-right, .face__nose, .face__pupil { animation: eyes 1s 0.3s cubic-bezier(0.65, 0, 0.35, 1) forwards; } .face__eye-lid, .face__pupil { animation-duration: 4s; animation-delay: 1.3s; animation-iteration-count: infinite; } .face__eye-lid { animation-name: eye-lid; } .face__mouth-left, .face__mouth-right { animation-timing-function: cubic-bezier(0.33, 1, 0.68, 1); } .face__mouth-left { animation-name: mouth-left; } .face__mouth-right { animation-name: mouth-right; } .face__nose { animation-name: nose; } .face__pupil { animation-name: pupil; } @keyframes eye-lid { from, 40%, 45%, to { transform: translateY(0); } 42.5% { transform: translateY(17.5px); } } @keyframes eyes { from { transform: translateY(112.5px); } to { transform: translateY(15px); } } @keyframes pupil { from, 37.5%, 40%, 45%, 87.5%, to { stroke-dashoffset: 0; transform: translate(0, 0); } 12.5%, 25%, 62.5%, 75% { stroke-dashoffset: 0; transform: translate(-35px, 0); } 42.5% { stroke-dashoffset: 35; transform: translate(0, 17.5px); } } @keyframes mouth-left { from, 50% { stroke-dashoffset: -102; } to { stroke-dashoffset: 0; } } @keyframes mouth-right { from, 50% { stroke-dashoffset: 102; } to { stroke-dashoffset: 0; } } @keyframes nose { from { transform: translate(0, 0); } to { transform: translate(0, 22.5px); } } </style> </head> <body> <main> <svg class="face" viewBox="0 0 320 380" width="320px" height="380px" aria-label="404 数字变成一张脸,左右张望并眨眼,嘴角画出微笑。"> <g fill="none" stroke="currentcolor" stroke-linecap="round" stroke-linejoin="round" stroke-width="25"> <g class="face__eyes" transform="translate(0, 112.5)"> <g transform="translate(15, 0)"> <polyline class="face__eye-lid" points="37,0 0,120 75,120" /> <polyline class="face__pupil" points="55,120 55,155" stroke-dasharray="35 35" /> </g> <g transform="translate(230, 0)"> <polyline class="face__eye-lid" points="37,0 0,120 75,120" /> <polyline class="face__pupil" points="55,120 55,155" stroke-dasharray="35 35" /> </g> </g> <rect class="face__nose" rx="4" ry="4" x="132.5" y="112.5" width="55" height="155" /> <g stroke-dasharray="102 102" transform="translate(65, 334)"> <path class="face__mouth-left" d="M 0 30 C 0 30 40 0 95 0" stroke-dashoffset="-102" /> <path class="face__mouth-right" d="M 95 0 C 150 0 190 30 190 30" stroke-dashoffset="102" /> </g> </g> </svg> </main> </body> </html>实现思路拆分 404 表情脸是怎么画出来的? 404 表情脸用单个 SVG 把数字「404」变成一张会动的人脸:两个「4」上滑变眼睛,中间的「0」下滑变鼻子,嘴角描边动画拼出微笑;全程纯 CSS,无 JavaScript。 说白了就三件事 HTML:一个 ,polyline / rect / path 分组为眼、鼻、嘴。 CSS:translateY 把 404 布局拆成五官位置;stroke-dashoffset 画嘴线与瞳孔。 动效:先 0.3s 延迟后五官归位,再循环眨眼、左右看、嘴线展开。 改节奏动 keyframes 百分比与 delay,改配色动 currentColor 与 light-dark 背景。 颜色为啥长这样 背景 / 描边:light-dark() 灰阶,跟随系统深浅色 SVG 统一 stroke="currentcolor",随主题反色 线条粗 stroke-width="25",卡通线稿感 无填充,纯描边结构 动起来是啥感觉 页面中央一张线稿脸,初始布局像「404」三字。 1.0.3 秒后两个「4」上滑变成双眼,中间「0」下滑成鼻子 2.左右嘴角描边从外向内画出,拼成微笑 3.瞳孔左右移动并配合眨眼(眼睑压下) 4.约 4 秒一轮循环,表情生动不闹 5.屏幕阅读器通过 aria-label 获知动画含义 怎么一层层画出来 SVG 结构 1..face__eyes:两组 polyline(眼睑 + 瞳孔竖线)。 2..face__nose:圆角 rect,从 0 的位置下移。 3..face__mouth-left/right:贝塞尔 path + dashoffset 画嘴角。 CSS 动画 1.eyes:整组 eyes 从 y=112.5 移到 y=15。 2.nose:translateY(22.5px) 下挪。 3.mouth-left/right:dashoffset 从 ±102 到 0 画嘴。 4.pupil:translateX 左右看 + 眨眼时 dashoffset。 5.eye-lid:translateY 快速压扁模拟眨眼。源码获取
-
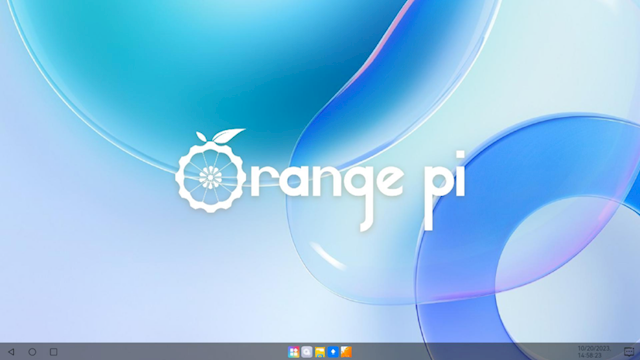
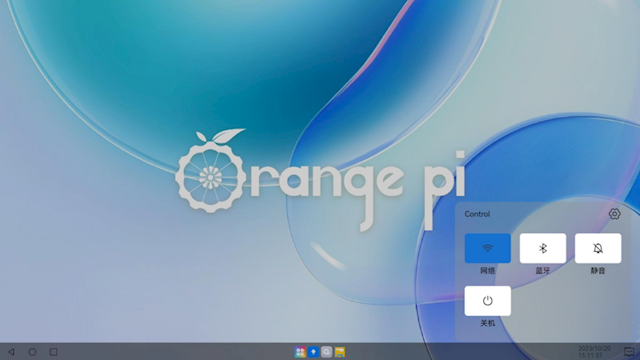
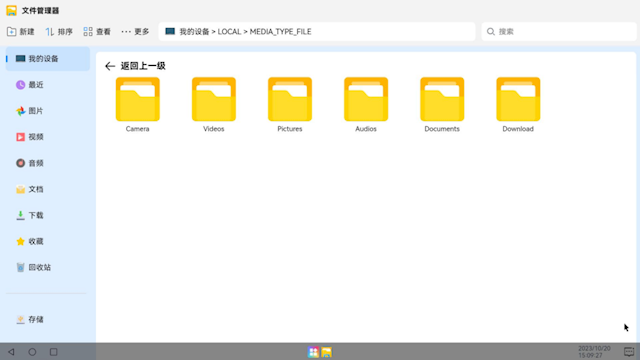
华为捐献代码!开源鸿蒙PC端来了:基本办公、娱乐搞定 10月26日消息,除自己的HarmonyOS鸿蒙系统外,华为还捐献了代码,联合多家单位推出了OpenHarmony开源鸿蒙,并开放使用,涉及各种产品。 日前,深圳市迅龙软件有限公司旗下开源产品品牌香橙派宣布,基于OpenHarmony定制研发的Orange Pi OS(OH)即将发布,这将是PC端的开源鸿蒙系统。 lo78ne7r.png图片 官方表示,Orange Pi OS(OH)已完成HDMI适配、5寸LCD显示屏适配、触摸功能适配、定制化的系统应用、开机动画、主题、壁纸、设置、文件管理器等。 华为捐献代码!开源鸿蒙PC端来了:基本办公、娱乐搞定 lo78n44y.png图片 控制中心 此次适配已支持设备正常开关机,原创应用包括任务栏、控制中心、设置、文件管理器、输入法、浏览器、播放器、应用商城等。 华为捐献代码!开源鸿蒙PC端来了:基本办公、娱乐搞定 lo78mxkw.png图片 文件管理器 并且具备运行热门App等基础功能,可满足基本的办公、娱乐需求。 华为捐献代码!开源鸿蒙PC端来了:基本办公、娱乐搞定 lo78mrc8.png图片 设置 按计划,Orange Pi OS(OH)将首先适配三款采用ARM架构CPU的设备。 华为捐献代码!开源鸿蒙PC端来了:基本办公、娱乐搞定 lo78mm9q.png图片 应用展示 设备包括:搭载RK3566的开发板Orange Pi 3B、搭载RK3588S的开发板Orange Pi 5、搭载RK3588的开发板Orange Pi 5 Plus。 华为捐献代码!开源鸿蒙PC端来了:基本办公、娱乐搞定 lo78mhhi.png图片 应用市场 值得一提的是,Orange Pi OS(OH)目前只适配支持ARM架构的PC,官方下一步计划适配X86架构PC。 香橙派官方介绍,Orange Pi OS为Orange Pi系列开发板、键盘电脑以及其它PC提供Orange Pi OS桌面。 可运行安卓、Windows和Linux应用,具有运行速度快、安全稳定、界面美观、操作简洁等特点。
-
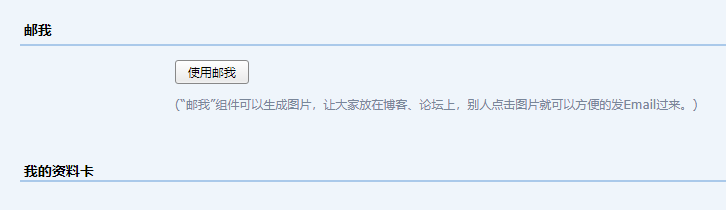
邮我链接失效?网站链接邮箱一个代码就搞定 当我们使用代码 http://mail.qq.com/cgi-bin/qm_share?t=qm_mailme&email=206524463@qq.com或者邮箱提供的邮我代码时,如下图: lk2zwmlc.png图片 经常会出现以下问题: lk2zv7sh.png图片 但明明官方给的这个链接,怎么就用不了呢? <a target="_blank" href="http://mail.qq.com/cgi-bin/qm_share?t=qm_mailme&email=UDw5NzgkJzUyECEhfjM-PQ" style="text-decoration:none;"><img src="http://rescdn.qqmail.com/zh_CN/htmledition/images/function/qm_open/ico_mailme_01.png"/></a>没事,不管因为什么,我们还是有非常简单的方法去替代的,我采用的是mailto方式: <a href="mailto:206524463@qqcom" target="_blank" rel="nofollo">意见反馈</a>这样,别人在点击这个按钮时,网站会自动弹出系统内置的邮箱,省事方便! lk302476.png图片 如果你觉得好用,麻烦评论留言,让我知道你在看!
-
无服务器部署ChatGPT聊天界面 使用Cloudflare部署Ai聊天前端界面,无需置备服务器,只要一个可以接入cloudflare的域名即可。 代码摘自开源项目 https://github.com/open-tdp/openai-chat功能介绍 支持基于gpt-3.5-turbo模型的对话 支持批量查询api到期时间和剩余额度 安装步骤 将代码部署到Cloudflare的worker平台(其他支持worker的平台也可) /** * @auther Rehiy * @url https://github.com/open-tdp/openai-chat */ const GITHUB_URL = 'https://raw.githubusercontent.com/open-tdp/openai-chat/master'; async function github_proxy(request) { const url = new URL(request.url); let backend = GITHUB_URL + url.pathname; if (url.pathname.endsWith('/')) { backend += 'index.html'; } const res = await fetch(backend, { method: request.method, headers: { 'User-Agent': request.headers.get('User-Agent'), }, }); const headers = new Headers(); headers.set('Content-Type', file_type(backend)); headers.set('Cache-Control', 'public, max-age=86400'); return new Response(res.body, { status: res.status, headers, }); } function file_type(url) { const ext = url.split('?').shift().split('.').pop(); const mines = { 'json': 'application/json', 'js': 'application/javascript', 'css': 'text/css', 'xml': 'text/xml', 'html': 'text/html', 'webm': 'video/webm', 'mp3': 'audio/mpeg', 'mp4': 'video/mp4', 'webp': 'image/webp', 'gif': 'image/gif', 'png': 'image/png', 'jpg': 'image/jpeg', 'jpeg': 'image/jpeg', 'svg': 'image/svg+xml', 'ico': 'image/x-icon', }; return mines[ext] || 'text/plain'; } // esmodule export default { async fetch(request, env) { return github_proxy(request); } }
-
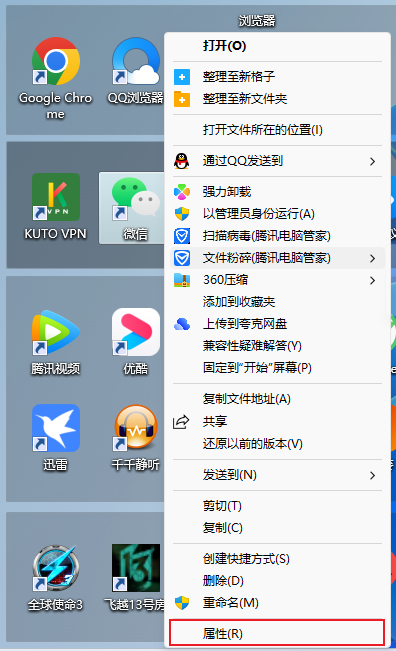
一段代码快速实现电脑微信双开,不限版本 大家都知道电脑版QQ支持同时登录多个账号,但电脑版微信默认同时只能登录一个账号,其实有个技巧,不用安装任何软件就可以实现微信多开。 我们首先在桌面上新建一个文本文档,内容为: taskkill /F /IM wechat.exe start "" "D:\Program Files (x86)\Tencent\WeChat\WeChat.exe" start "" "D:\Program Files (x86)\Tencent\WeChat\WeChat.exe"接着右击微信打开属性按钮,复制其中的路径:D:\Program Files (x86)\Tencent\WeChat\WeChat.exe li8njqt5.png图片 li8nlo57.png图片 然后替换上述代码中的路径即可: li8nm24w.png图片 需要多开几个就复制几个: start "" "D:\Program Files (x86)\Tencent\WeChat\WeChat.exe"接着保存后修改后缀名为bat,双击打开就行了。 li8nmf18.png图片 li8nmrzg.png图片